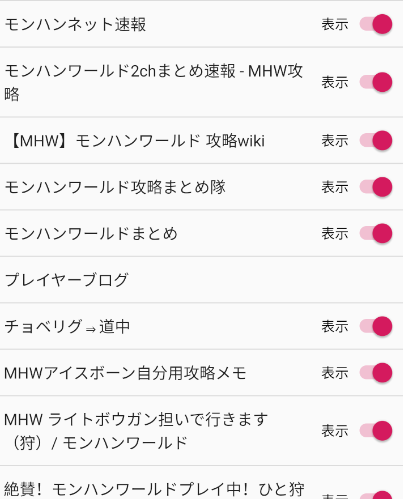
所謂、こういったUI

SwitchのshowText属性を使わないのであれば、狡いことをしてSwitchごとの値を簡単に管理できる。
layout
ListViewの要素となるitemは以下のように記述したものとする
<?xml version="1.0" encoding="utf-8"?>
<androidx.constraintlayout.widget.ConstraintLayout
    xmlns:android="http://schemas.android.com/apk/res/android"
    xmlns:app="http://schemas.android.com/apk/res-auto"
    xmlns:tools="http://schemas.android.com/tools"
    android:layout_width="match_parent"
    android:layout_height="wrap_content">

    <TextView
            android:layout_width="0dp"
            android:layout_height="wrap_content"
            app:layout_constraintTop_toTopOf="parent"
            android:layout_marginTop="12dp"
            android:id="@+id/name"
            app:layout_constraintStart_toStartOf="parent"
            android:layout_marginLeft="8dp"
            android:layout_marginStart="8dp"
            app:layout_constraintBottom_toBottomOf="parent"
            android:layout_marginBottom="12dp"
            app:layout_constraintEnd_toStartOf="@+id/disableSwitch"
            android:layout_marginEnd="16dp"
            android:layout_marginRight="16dp"
            android:textAppearance="@style/TextAppearance.AppCompat.Large"/>
    <Switch
            android:text="@string/blogEnable"
            android:layout_width="wrap_content"
            android:layout_height="wrap_content"
            android:id="@+id/disableSwitch"
            android:layout_marginEnd="8dp"
            android:layout_marginRight="8dp"
            app:layout_constraintEnd_toEndOf="parent"
            app:layout_constraintTop_toTopOf="@+id/name"
            app:layout_constraintBottom_toBottomOf="@+id/name"
            android:checked="true"/>
</androidx.constraintlayout.widget.ConstraintLayout>
ListView Aapter
ViewHolderにSwitchViewを保持しておき、
val switch = itemView.findViewById<Switch>(R.id.disableSwitch)
AdapterのgetView()時に引数:positionに対応した値をtextOffまたはtextOn属性にセットしておけばよい(笑)
但し、showText=trueにするとセットした値が画面上に表示されてしまうので、showTextを利用しない時限定で。また、textOff、textOnのプロパティを利用することが出来るので、1つのSwitchに対して2つの値をpositionごとに持つことが可能である。あとは下記例のようにChangeListenerでtextOff、textOnの属性を確認すれば、どのSwitchに変更があったか容易に確認できる。
holder.switch.textOff = position.toString
holder.switch.textOn = array[position]
holder.switch.setOnCheckedChangeListener { buttonView, isChecked ->
    val v = buttonView as Switch
    Log.d("change", isChecked.toString())
    Log.d("type", v.textOff.toString())
    Log.d("id", v.textOn.toString())
}

