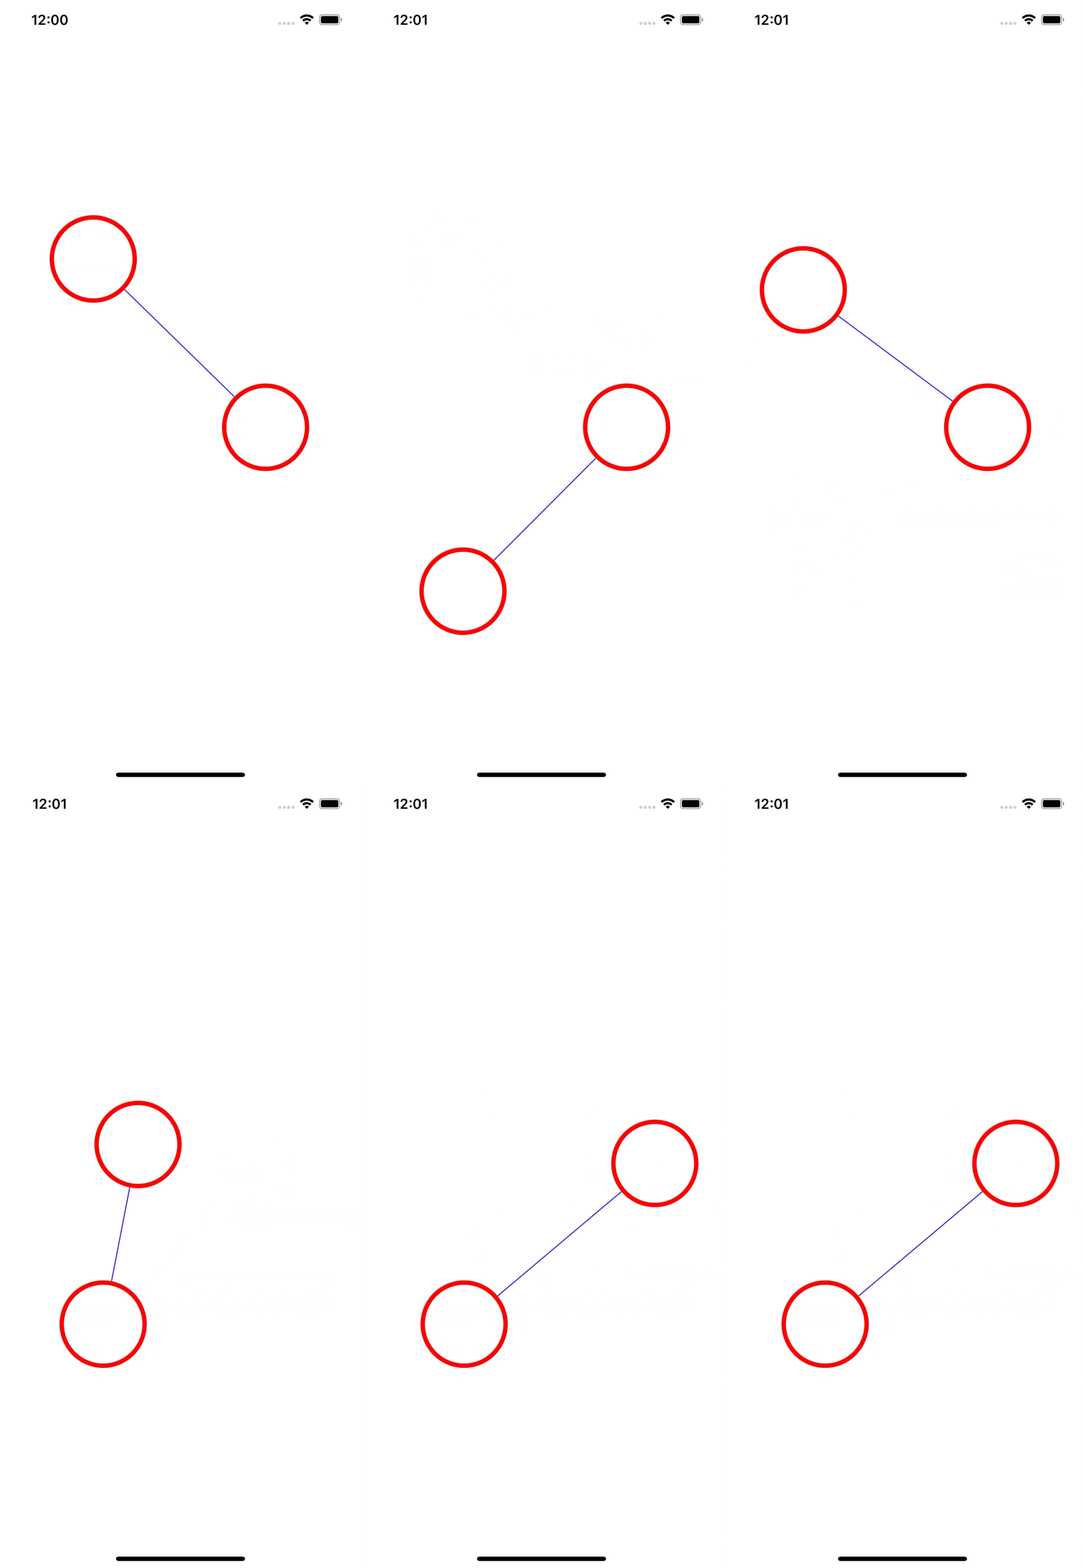
最近、趣味でNeo4jを触ってて、Swift実装でソーシャルグラフのようなView表現を試してみた。
実装のイメージ

※ 何故かXcodeの動画キャプチャがエラー吐きまくりでカクカクになってしまった...
まあ、こんなもんかな。strokeした線は消して再描画するみたい pic.twitter.com/v8NgpgD6I6
— Fumiya Ichikawa (@LET__IT__RIDE) February 12, 2020
ドラッグ可能なViewの実装
Viewは拡張クラス及び、ドラッグ時のdelegateを定義するようにした。
何故、delegateで移譲したかというとtouch.location(in:view)でタップ場所を取得する時、引数のviewで指定したoriginを起点にした座標軸になってしまう。親viewの座標を元にViewを移動配置したいので親View側で実装した方が効率が良い。
また後述する線の描画は親view側のlayerに配置するので、親view側でドラッグのイベントを定義できたほうが色々と都合が良い。
protocol MViewDelegate{
    func move(_ touches: Set<UITouch>, with event: UIEvent?)
}

class MView: UIView {

    var delegate:MViewDelegate?
    override init(frame: CGRect) {
        super.init(frame: frame)
        self.layer.borderColor = UIColor.red.cgColor
        self.layer.borderWidth = 5
        self.layer.backgroundColor = UIColor.white.cgColor
        self.layer.cornerRadius = 50
    }

    required init?(coder aDecoder: NSCoder) {
        super.init(coder: aDecoder)
    }

    override func touchesMoved(_ touches: Set<UITouch>, with event: UIEvent?) {
        self.delegate?.move( touches, with: event)
    }
}
Viewの配置
配置はこんな感じ。
class ViewController: UIViewController {

    let view1 = MView(frame: CGRect(x: 50, y: 50, width: 100, height: 100))
    let view2 = MView(frame: CGRect(x: 200, y: 200, width: 100, height: 100))

    override func viewDidLoad() {
        super.viewDidLoad()
        view1.delegate = self
        view2.delegate = self
        self.view.addSubview(view1)
        self.view.addSubview(view2)
    }
}

extension ViewController:MViewDelegate{

    func move(_ touches: Set<UITouch>, with event: UIEvent?) {
        guard let touch = touches.first, let view = touch.view else { return }
        let location = touch.location(in: self.view)
        view.center = location
    }
}
let location = touch.location(in: self.view)
view.center = location
この部分でドラッグしているviewのcenterを親view(この場合はViewControllerのsefl.view)上でタップされている位置に動かしている。
View間に線を描画する
線はfromView.centerとtoView.centerをつなぐような線をstrokeすればよい。
shapeLayerをaddSublayerした後、各viewをaddSubViewすることでviewが線の前面にくる。
class ViewController: UIViewController {

    let view1 = MView(frame: CGRect(x: 50, y: 50, width: 100, height: 100))
    let view2 = MView(frame: CGRect(x: 200, y: 200, width: 100, height: 100))

    let line1 = UIBezierPath()
    let shapeLayer = CAShapeLayer()

    override func viewDidLoad() {
        super.viewDidLoad()
        view1.delegate = self
        view2.delegate = self

        self.strokeLine()
        view.layer.addSublayer(shapeLayer)

        self.view.addSubview(view1)
        self.view.addSubview(view2)

    }

    private func strokeLine(){
        self.line1.move(to: view1.center)
        self.line1.addLine(to: view2.center)
        self.line1.stroke()
        self.shapeLayer.strokeColor = UIColor.blue.cgColor
        self.shapeLayer.path = self.line1.cgPath
    }
}
Viewの移動によって線を伸縮する
この実装方法を1時間くらい彷徨った(笑)
Swiftで一度strokeした線をドラッグに応じて伸縮させる手法ないかな。調べても良さそうな方法が出てこない
— Fumiya Ichikawa (@LET__IT__RIDE) February 12, 2020
一度drawした線自体を変更することはできないようなので、ここを参考にviewドラッグ時にremoveして再描画するような手法で実装した。
参考にしたページhttps://t.co/as2grfM5tp
— Fumiya Ichikawa (@LET__IT__RIDE) February 12, 2020
class ViewController: UIViewController {

    let view1 = MView(frame: CGRect(x: 50, y: 50, width: 100, height: 100))
    let view2 = MView(frame: CGRect(x: 200, y: 200, width: 100, height: 100))

    let line1 = UIBezierPath()
    let shapeLayer = CAShapeLayer()

    //...略
}

extension ViewController:MViewDelegate{

    func move(_ touches: Set<UITouch>, with event: UIEvent?) {
        guard let touch = touches.first, let view = touch.view else { return }
        let location = touch.location(in: self.view)
        view.center = location

        self.line1.removeAllPoints()
        self.strokeLine()

    }
}

