概要
TableViewのcellの要素のサイズが動的に変更される時のcellの高さを自動で調整する。
cellの高さを変更する手法
まずはcellの高さを変更する手法から。
autolayoutが適切に設定されていて、制約からcellの高さが導き出せる時は、
override func viewDidLoad() {
    super.viewDidLoad()
    self.tableView.delegate = self
    self.tableView.dataSource = self
    tableView.rowHeight = UITableView.automaticDimension
}
のようにrowHeightにUITableView.automaticDimensionを指定すればよい。
autolayoutを指定しない場合は、heightForRowAt delegateを実装して高さを返す。
func tableView(_ tableView: UITableView, heightForRowAt indexPath: IndexPath) -> CGFloat {
    return "indexPathに応じたcellの高さ"
}
autolayout + 要素の高さが変更されるView のcell高さ自動調整
では、autolayoutで以下のようなTableViewのセルに動的に要素が追加される場合、どういった手法がとれるか。
一番上のcellにはタグのようなUIButtonを複数個配置してあり、親viewの幅に収まらない場合、折り返して配置してある。

autolayoutを使用するので、viewDidLoad内にtableView.rowHeight = UITableView.automaticDimensionを設定しているものとする。
タグとなるUIButtonを格納するUIViewを配置する


配置したUIViewのconstraint height(autolayoutのheight制約)を0に設定する。
cellクラスを作成する
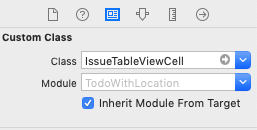
cellクラスを作成する。各プロパティはstoryboardからoutlet接続した各要素。またautolayoutの制約もoutlet接続できるので、0に設定したUIViewのheight制約も接続しておく。


class IssueTableViewCell: UITableViewCell {

    @IBOutlet weak var titleLabel: UILabel!
    @IBOutlet weak var dateLabel: UILabel!
    @IBOutlet weak var tagsView: UIView!
    @IBOutlet weak var tagsHeight: NSLayoutConstraint!

    override func awakeFromNib() {
        super.awakeFromNib()
    }

    override func setSelected(_ selected: Bool, animated: Bool) {
        super.setSelected(selected, animated: animated)
    }
}
作成したクラスファイルはstoryboard上のcell要素と紐づけておく。

tableView cellForRowAtの処理
最後に配置したUIButtonのmaxY(親UIView(x:0, y:0)からのbottom位置)にmarginを加えた量をUIViewの高さ制約に指定すればよい。
func tableView(_ tableView: UITableView, cellForRowAt indexPath: IndexPath) -> UITableViewCell {
    let cell = tableView.dequeueReusableCell(withIdentifier: "cell", for: indexPath) as! IssueTableViewCell
    cell.dateLabel.text = "2019/8/27 7:00"
    cell.titleLabel.text = "見出し見出し見出し"

    if( indexPath.row == 0 ){
        var x:CGFloat = 0
        var y:CGFloat = 0
        //UIViewの高さ制約値
        var maxY:CGFloat = 0
        for i in 0...10{
            let button = UIButton(frame: CGRect(x: x, y: y, width: 0, height: 0))
            button.setTitle(String(i) + "番目のボタン", for: .normal)
            button.sizeToFit()
            button.backgroundColor = UIColor.red

            x += button.frame.size.width + 5
            //折り返し判定
            if( button.frame.maxX >= cell.tagsView.frame.maxX){
                x = 0
                button.frame.origin.x = x
                y = y + button.frame.size.height + 5
                button.frame.origin.y = y
            }
            //UIViewのheight
            maxY = button.frame.maxY
            cell.tagsView.addSubview(button)
        }
        //UIViewの制約の変更
        cell.tagsHeight.constant = maxY + 8
    }
    return cell
}
もちろんUIButtonを配置しない場合はcell.tagsHeight.constanは0のままなので、UIViewが取って詰めたような表現となる。

