storyboard + swiftでmodal遷移の実装
遷移先、遷移元となるViewControllerを定義
storyboard上に遷移元、遷移先となる2つのViewControllerを配置。また、ViewControllerクラスの作成を行う。
ViewControllerクラスは
- 遷移元:OpeningViewController
- 遷移先:DestinationViewController
とした。
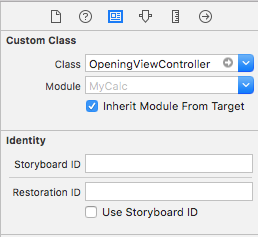
storyboardとViewControllerクラスの紐付けは、storyboard上のIdentity InspectorのCustom ClassのClass項目より行う。

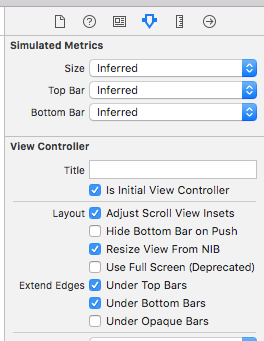
アプリ起動時に最初に利用するViewControllerをOpeningViewControllerに設定する。設定はstoryboard上のOpeningViewControllerのAttributes Inspector、Is Initial View Controllerにチェックをつける。

また、今回は、OpeningViewControllerに遷移を行うButtonの配置を行った。
ViewController間でsegueの紐付けを行う
segueとは"シーンとシーンを接続し画面遷移を行うための部品"。storyboard上では、ViewController間での矢印で表される。
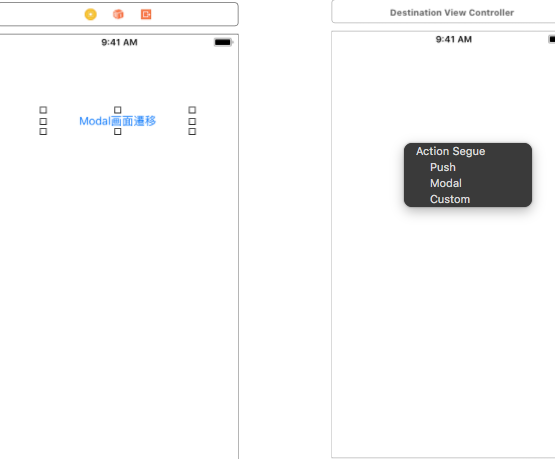
storyboard上で遷移を行うButtonから遷移先のViewControllerへControlKey + ドラッグで紐づけることによって簡単に定義できる。
Action Segue(画面が切り替わる時の効果)の選択を求められるので、Modalを選択

これでModal遷移のコンディションが整った。
ViewController間で値の受け渡しを行う
値の受け渡しは、遷移元のViewControllerで定義を行う。定義はセグエで画面遷移する前に通知されるprepareメソッドを記述する。
OpeningViewController.swift
override func prepare(for segue: UIStoryboardSegue, sender: Any?) {
    //遷移先のViewControllerを取得
    let destinationViewController = segue.destination as! DestinationViewController
    destinationViewController.recieveValue = "submit value"
}
segueには遷移先、遷移元など画面間の情報が入る。senderは画面遷移の契機となったオブジェクトの情報が入る。今回はButton。
DestinationViewController.swift
//OpeningViewControllerからの値を格納
var recieveValue: String = ""
これで、DestinationViewController.recieveValue に"submit value"が渡される。
Modalから戻る
Modalから戻った後にOpeningViewControllerで行う処理を定義。
OpeningViewController.swift
@IBAction func close(_ segue: UIStoryboardSegue ){
    //必要があれば記述
}
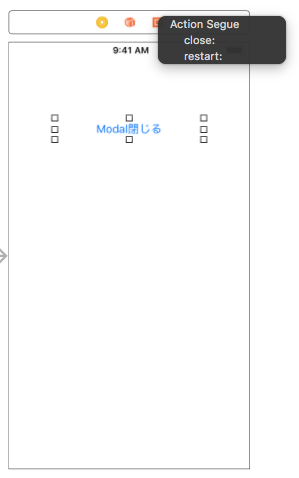
storyboard上のDestinationViewControllerの戻る契機となるボタンと上部、EXITとをControlKey + ドラッグで紐づけを行う。Action Segueの選択を求められるので、OpeningViewControllerで定義を行った closeメソッドを選択する。


